Written by Philipp on 2023-11-20
Fixing Issues after upgrading Proxmox 7 to 8
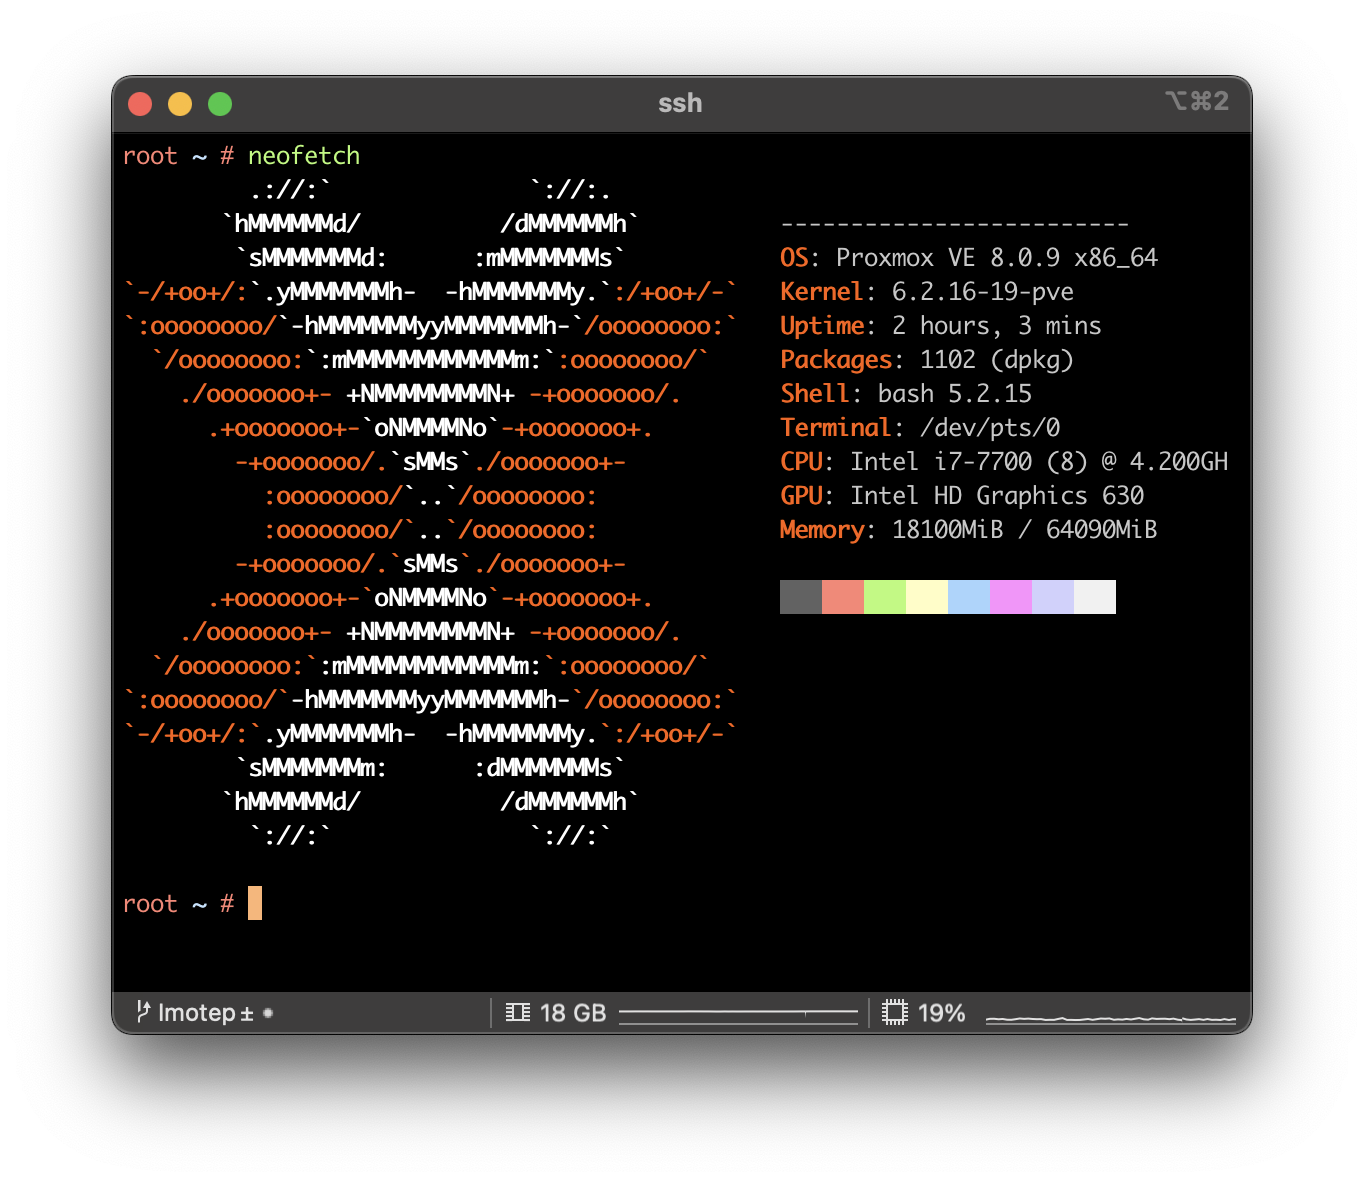
CLI . Network . ProxmoxMy initial plan was to update all of my Proxmox nodes to the latest version by the end of this year. While most updates proceeded smoothly, I encountered two errors on one particular node. Given that updating servers is a critical operation, especially when they are only remotely accessible via the network, I decided to

Written by Philipp on 2015-09-29
Install CoreOS on Proxmox
Network . Tooling . Uncategorized . VirtualisierungSome words before we start… Hello Blog, it’s been a while. I still have to deliver the last part of the Munin Plugin Development Series (Part 1, 2, 3). Today I would like to write something about the Setup of a CoreOS Environment on Proxmox. Proxmox is a Debian based Distribution that bundles a Web
Written by Philipp on 2014-06-22
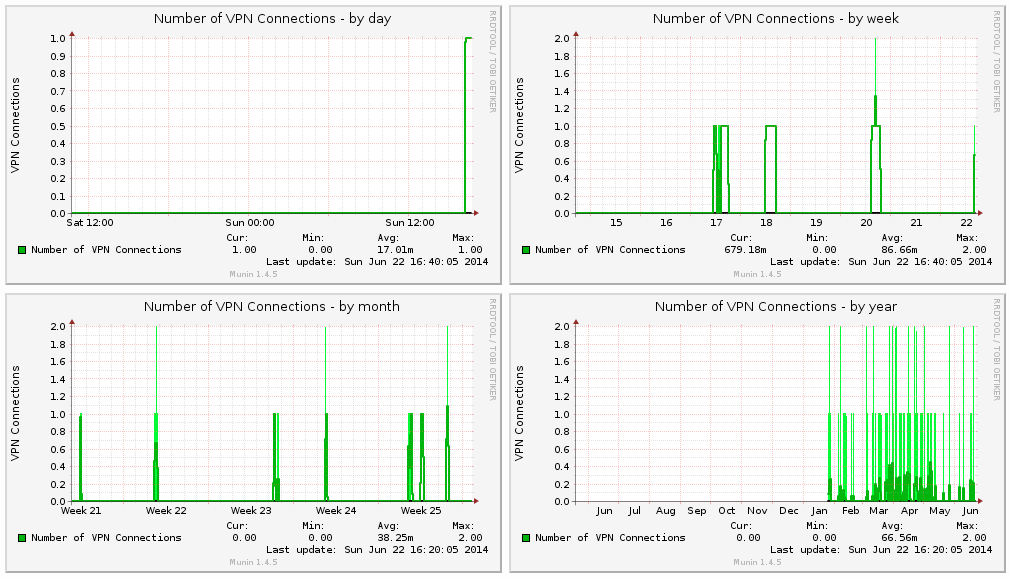
Writing Munin Plugins pt2: counting VPNd Connections
Mac . Network . Perl . ToolingPreamble Every Munin Plugin should have a preamble by default: #!/usr/bin/env perl # -*- perl -*- =head1 NAME dar_vpnd a Plugin for displaying VPN Stats for the Darwin (MacOS) vpnd Service. =head1 INTERPRETATION The Plugin displays the number of active VPN connections. =head1 CONFIGURATION No Configuration necessary! =head1 AUTHOR Philipp Haussleiter <philipp@haussleiter.de> (email) =head1 LICENSE

Written by Philipp on 2014-06-22
Writing Munin Plugins pt1: Overview
Bash . Mac . NetworkWriting your own Munin Plugins Around February this year, we at innoQ had the need for setting up a Mac OS based CI for a Project. Besides building of integrating some standard Java Software, we also had to setup an Test Environment with Solaris/Weblogic, Mac OS for doing a CI for an iOS Application and

Written by Philipp on 2013-08-04
Build and Test Project TOX under MacOS
Build . Hacking . Network . ToolingSome Steps to do You need to have XCode with installed CLI Tools (see here) If you are using MacPorts (you really should), you need to install all necessary Dependencies: port install libtool automake autoconf libconfig-hr libsodium cmake Checkout the Project TOX Core Repository: git clone –recursive https://github.com/irungentoo/ProjectTox-Core.git cd ProjectTox-Core cmake . make all You
Written by Philipp on 2012-05-29
Fixing Redirects of a Play! App behind an Apache2 SSL Proxy
Java . Network . Play! FrameworkSo you just finished your first Play! App. You want to run that thing behind an Apache2 as a HTTPS Proxy, because you do not want, that your User-Credentials are read as clear text. So a very basic Apache Configuration looks like this: <IfModule mod_ssl.c> Listen 443 SSLRandomSeed startup builtin SSLRandomSeed
Written by Philipp on 2012-03-21
Run local/remote terminal commands with java using ssh
Java . Network . Play! Framework . SnippetsSometimes you need to use some CLI-Tools before you want to create or search for a native JNI Binding. So there is a common way, using the Java Process-Class. But then you might meet two problems i had to face in the past during several problems: There are (a really small) number of CLI-Tools, that
Written by Philipp on 2008-07-01
Multicast – genauer Nachgeschaut
Java . NetworkDa das ja heute bei der Tafelrunde eher etwas zusammengesucht war, habe ich mich noch mal hingesetzt und mir die Dinge an-/eingelesen. Ich werde einfach mal versuchen die Fragen, die da aufkamen wiederzugeben und dann mit passenden Texten beantworten: Was ist Multicast? Multicast ist eine Nachrichtenübertragung von einem Punkt zu einer Gruppe von Empfängern (auch
Written by Philipp on 2008-02-07
SSL erzwingen in einem Java Application Server
Java . NetworkMorgen :-), so langsam bin ich dabei alle meine Problem gelöst zu bekommen 🙂 – ja wird auch Zeit :-D. Bezogen auf diesem Post: Ich bin an der Implementierung mit JAAS noch dran, allerdings habe ich herausgefunden, dass man dem Server einen Filter unterschieben kann, der bei jedem Aufruf überprüft, ob eine SSL Verbindung besteht,