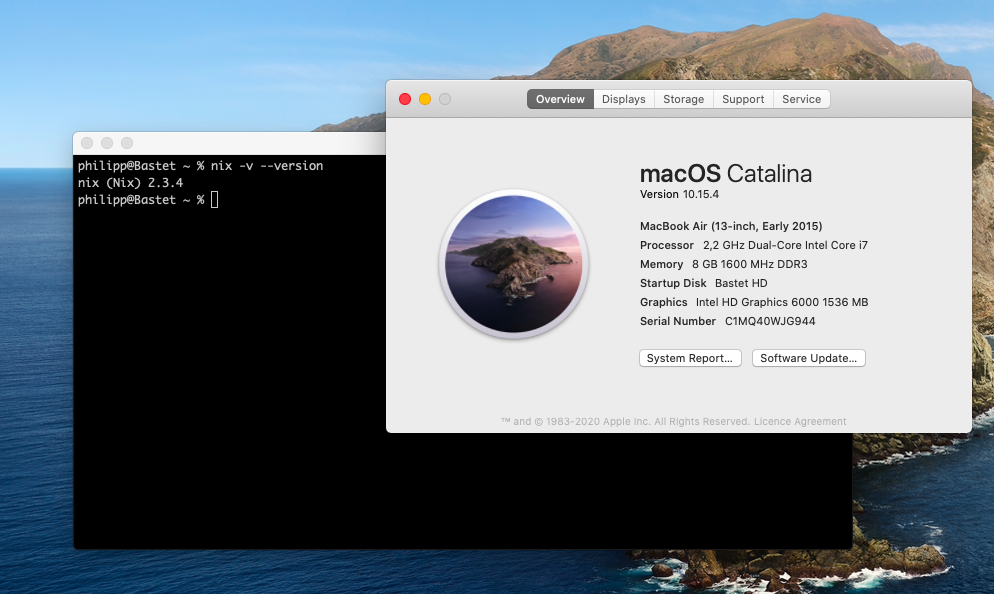
Fixing nix Setup on MacOS Catalina

Flattr this!

With MacOS Catalina (10.15), Apple decided to decrease the possibilities of system users to install software applications within the system. That means, that it is not possible anymore to install software at specific location in your system, since most system folder ware mounted read-only at boot to improve the overall system security.

That leads to an installation error if you want to install Nix in MacOS Catalina /nix will not be writable on macOS Catalina #2925 .

In another Issue above there are three Options mentioned by user garyverhaegen-da to circumvent this problem, all with some more or less hefty drawbacks.

The good thing is, that with the use of the APFS System, it is very easy possible to setup a specific FS for nix without the use of an DMG Image and mount it under the correct /nix path.

These are the steps you can do to fix the problem:

!! This approach does only work if you have a Disk that is formated with APFS
(that should always be the case, if your OS is running of a SSD).

You can check this with:

% diskutil list | grep APFS

…
0:      APFS Container Scheme -                      +250.8 GB   disk1
…

Of you have an output here, everything is fine. Otherwise you might have a look into How to Convert to APFS .

1 Create another Volume on your Disk for NIX

This can be done via the Disk Utility Program,

or via the CLI:

% sudo diskutil apfs addVolume disk1 ‘APFS’ nix

Will export new APFS Volume "nix" from APFS Container Reference disk1
Started APFS operation on disk1
Preparing to add APFS Volume to APFS Container disk1
Creating APFS Volume
Created new APFS Volume disk1s6
Mounting APFS Volume
Setting volume permissions
Disk from APFS operation: disk1s6
Finished APFS operation on disk1

After that, you should see a volume nix if you are running diskutil list.
The great thing is, that this volume does not need to have a fixed size. APFS shares the free disk spaces over all configured volumes!

1b (optional) encrypt disk

If you want to, you can also activate Disk Encryption for te new Disk. First you need to find out the name of your new Disk (if you did not note it from the previous command ;-)).

% diskutil list | grep nix

4:                APFS Volume nix                      7.7 GB    disk1s6

% sudo diskutil apfs encryptvolume disk1s6 -user disk

You need to enter a passphrase for the encryption. You have to remember that passphrase once – you can add it to your key chain later on.

Passphrase for the new "Disk" user (672C4CFF-34C6-4407-83ED-294C1C42E161):
Repeat passphrase:

After that the disk encryption will start in the background:

Starting background encryption with the new "Disk" crypto user on disk1s6
The new "Disk" user will be the only one who has initial access to disk1s6
The new APFS crypto user UUID will be 672C4CFF-34C6-4407-83ED-294C1C42E161
Background encryption is ongoing; see "diskutil apfs list" to see progress

2 setup Mount Point

MacOS Catalina does not allow to create folders directly under your Root Path /. But we can use another method to have MacOS create that folder for us. To do this, we have to add an entry into the file /etc/synthetic.conf:

% sudo bash -c “echo nix >> /etc/synthetic.conf”

Now, the next time, the system starts, a mount point /nix will be created. The next task is to have our Volume mounted at Boot.

3 setup Mount

For the Mount Configuration, we need to the UUID of the Volume. We can find this via the diskutil tool:

% diskutil info /dev/disk1s6 | grep UUID

Volume UUID:               1D9389C1-5676-4077-88F5-8D5304A0B1A6
Disk / Partition UUID:     1D9389C1-5676-4077-88F5-8D5304A0B1A6

In previoues version, you would just edit /etc/fstab and adding an entry there. But here is a clear info in that file to only edit it via vifs. The Tool vifs works like vi so an edit is quite easy.

% sudo vifs

We have to enter instert mode whith prssing the Key I.

After that, we can just paste this line into the editor window:

UUID=1D9389C1-5676-4077-88F5-8D5304A0B1A6 /nix apfs  rw

!! This UUID is only valid for my volume – your mileage may vary 

We now have to write our changes: press ESC to leave the insert mode, type :w + ENTER to save the changes and :q + ENTER to exit the editor.

4 Reboot

Before we can start our nix Setup, we have to reboot the system.

If you have enabled the disk encryption, you will be asked for the passphrase after the system has restarted. You need to enter it once and mark “add to key chain”. The next time, the disk should be mounted automatically.

5 Setup Nix

You can now proceed with the installation of Nix. Everything should work as expected. Since it is a realy Mount Point and no Softlink, there should be no errors expected.

% sh <(curl https://nixos.org/nix/install)

  % Total    % Received % Xferd  Average Speed   Time    Time     Time  Current
                                 Dload  Upload   Total   Spent    Left  Speed
100  2399  100  2399    0     0   9913      0 --:--:-- --:--:-- --:--:--  9995
downloading Nix 2.3.4 binary tarball for x86_64-darwin from 'https://nixos.org/releases/nix/nix-2.3.4/nix-2.3.4-x86_64-darwin.tar.xz' to '/var/folders/y3/29k7dx8s50l4y_l2tr78b_vh0000gn/T/nix-binary-tarball-unpack.XXXXXXXXXX.Fe7OlFzr'...
  % Total    % Received % Xferd  Average Speed   Time    Time     Time  Current
                                 Dload  Upload   Total   Spent    Left  Speed
100    87  100    87    0     0    878      0 --:--:-- --:--:-- --:--:--   878
100 26.6M  100 26.6M    0     0  11.3M      0  0:00:02  0:00:02 --:--:-- 12.0M
Note: a multi-user installation is possible. See https://nixos.org/nix/manual/#sect-multi-user-installation
performing a single-user installation of Nix...
copying Nix to /nix/store.............................................
installing 'nix-2.3.4'
building '/nix/store/96xp8q08cm412ibj8bhrgivx3hgc2gfx-user-environment.drv'...
created 7 symlinks in user environment
installing 'nss-cacert-3.49.2'
building '/nix/store/qjabndqd4kdjwlpiphwxrk84acy7x60k-user-environment.drv'...
created 9 symlinks in user environment
unpacking channels...
created 1 symlinks in user environment
modifying /Users/philipp/.bash_profile...

Installation finished!  To ensure that the necessary environment
variables are set, either log in again, or type

  . $HOME/.nix-profile/etc/profile.d/nix.sh

in your shell.

5b Hint

To have the nix commands in your path, you have to add the following to your  .zshrc file, since Catalina uses ZSH as the default shell:

  . $HOME/.nix-profile/etc/profile.d/nix.sh

solving Security Error while starting Java WebStart (e.g. IPMI Remote)

Flattr this!

Most of the IPMI Systems out there still using good old Java based Remote Applications to connect to the remote console.
Sine Java 8 update 111, the MD5 singing algorithm was marked as insecure (aka disabled) by Oracale (see Relase Notes for that Release ” Restrict JARs signed with weak algorithms and keys”).
You will get an “Security Error while using MD5withRSA Signature”:


The only solution to fix this error is to have your Hardware Vendor to update the IPMI Firmware with JARs, signed with a more up to date singing algorithm. A work around is to re-enable MD5 for the time being. For that you need to get into your Browser Java Installation.
On my Mac this is in


/Library/Internet Plug-Ins/JavaAppletPlugin.plugin/Contents/Home

You need to edit lib/security/java.security and remove MD5 from jdk.jar.disabledAlgorithms.

Change


jdk.jar.disabledAlgorithms=MD2, MD5, RSA keySize < 1024

to


jdk.jar.disabledAlgorithms=MD2, RSA keySize < 1024

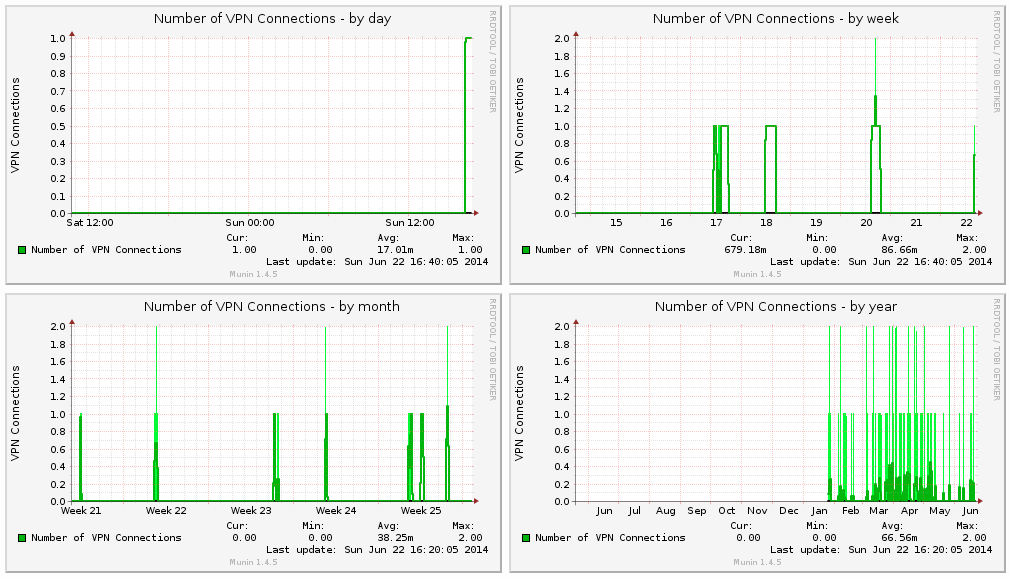
Writing Munin Plugins pt2: counting VPNd Connections

Flattr this!

Preamble

Every Munin Plugin should have a preamble by default:

#!/usr/bin/env perl
# -*- perl -*-

=head1 NAME

dar_vpnd a Plugin for displaying VPN Stats for the Darwin (MacOS) vpnd Service.

=head1 INTERPRETATION

The Plugin displays the number of active VPN connections.

=head1 CONFIGURATION

No Configuration necessary!

=head1 AUTHOR

Philipp Haussleiter <philipp@haussleiter.de> (email)

=head1 LICENSE

GPLv2

=cut

# MAIN
use warnings;
use strict;

As you can see, this Plugin will use Perl as the Plugin language.

After that you have some information about the Plugin Usage:

  • Name of the Plugin + some description
  • Interpretation of the delivered Data
  • Information about the Plugins Configuration (not necessary here, we will see that in the other Plugins)
  • Author Name + Contact Email
  • License

# MAIN marks the beginngin of the (main) code.

Next you see some Perl Setup, using strict Statements and also show warnings.

Gathering Data

First you should always have a basic idea how you want collect your Data (e.g. which user will use what command to get what kind of data).

For Example we can get all VPN Connections in Mac OS (Server) searching the process List for pppd processes.

ps -ef | grep ppp
    0   144     1   0  5Mär14 ??        10:35.34 vpnd -x -i com.apple.ppp.l2tp
    0 29881   144   0  4:12pm ??         0:00.04 pppd serverid com.apple.ppp.l2tp nodetach proxyarp plugin L2TP.ppp ms-dns 10.XXX.YYY.1 debug logfile /var/log/ppp/vpnd.log idle 7200 noidlesend lcp-echo-interval 60 lcp-echo-failure 5 mru 1500 mtu 1280 receive-all ip-src-address-filter 1 novj noccp intercept-dhcp require-mschap-v2 plugin DSAuth.ppp plugin2 DSACL.ppp l2tpmode answer :10.XXX.YYY.233
    0 22567   144   0  4:12pm ??         0:00.04 pppd serverid com.apple.ppp.l2tp nodetach proxyarp plugin L2TP.ppp ms-dns 10.XXX.YYY.1 debug logfile /var/log/ppp/vpnd.log idle 7200 noidlesend lcp-echo-interval 60 lcp-echo-failure 5 mru 1500 mtu 1080 receive-all ip-src-address-filter 1 novj noccp intercept-dhcp require-mschap-v2 plugin DSAuth.ppp plugin2 DSACL.ppp l2tpmode answer :10.XXX.YYY.234    

Collecting only the IP you need some more RegExp using awk:

ps -ef | awk '/[p]ppd/ {print substr($NF,2);}'
10.XXX.YYY.233
10.XXX.YYY.234

We are only interested in the total Connection Count. So we use wc for counting all IPs:

ps -ef | awk '/[p]ppd/ {print substr($NF,2);}' | wc -l
       2

So we now have a basic command that gives us the Count of currentyl connected users.

Configuration

The next thing is how your Data should be handled by the Munin System.
Your Plugin needs to provide Information about the Field Setup.

The most basic (Perl) Code looks like this:

if ( exists $ARGV[0] and $ARGV[0] eq "config" ) {
    # Config Output
    print "...";    
} else {
    # Data Output
    print "...";
}

For a more Information about fieldnames, please follow the above Link.

Our Plugin Source looks like this:

# MAIN
use warnings;
use strict;


my $cmd = "ps -ef | awk '/[p]ppd/ {print substr(\$NF,2);}' | wc -l";

if ( exists $ARGV[0] and $ARGV[0] eq "config" ) {
    print "graph_category VPN\n";
    print "graph_args --base 1024 -r --lower-limit 0\n";    
    print "graph_title Number of VPN Connections\n";
    print "graph_vlabel VPN Connections\n";
    print "graph_info The Graph shows the Number of VPN Connections\n"; 
    print "connections.label Number of VPN Connections\n";
    print "connections.type GAUGE\n";   
} else {
    my $output = `$cmd`;
    print "connections.value $output";
}

Implementation

To test the Plugin you can use munin-run:

> /opt/local/sbin/munin-run dar_vpnd config
graph_category VPN
graph_args --base 1024 -r --lower-limit 0
graph_title Number of VPN Connections
graph_vlabel VPN Connections
graph_info The Graph shows the Number of VPN Connections
connections.label Number of VPN Connections
connections.type GAUGE
> /opt/local/sbin/munin-run dar_vpnd
connections.value        1

Example Graphs

Some basic (long time) Graphs look like this:

munin_vpnd_connections_macos

Writing Munin Plugins pt1: Overview

Flattr this!

Writing your own Munin Plugins

Around February this year, we at innoQ had the need for setting up a Mac OS based CI for a Project. Besides building of integrating some standard Java Software, we also had to setup an Test Environment with Solaris/Weblogic, Mac OS for doing a CI for an iOS Application and a Linux System that contains the Jenkins CI itself.
Additionally the whole Setup should be reachable via VPN (also the iOS Application itself should be able to reach the Ressources via VPN).

To have the least possible obsticles in Setting up the iOS CI and the iOS (iPad) VPN Access, we decide to use Mac OS Server as the Basic Host OS. As the Need for Resources are somehow limited for the other Systems (Solaris/Weblogic, Linux/Jenkins), we also decide to do a basic VM Setup with VMWare Fusion.

Since we have a decent Munin Monitoring Setup in our Company for all our Systems, we need some Monitoring for all Services used in our Setup:

Beside the Standard Plugins (like Network/CPU/RAM/Disk) that was basically

  • Jenkins CI
  • VMware Fusion
  • VPN

After searching through the Munin Plugin Repository we couldn’t find any plugins providing the necessary monitoring. So the only choice was to write your own set of plugins. Since all three Plugins use different Approaches for collecting the Data, i plan two writer three different posts here. One for each Plugin. The Sources are availible online here and might be added to the main Munin Repo as soon as the Pull Requests are accepted.

How Munin works

But first a brief overview of Munin. Munin is a TCP based Service that has normally one Master and one Node for each System that needs to be monitored. The Master Node ask all Nodes periodicly for Monitoring Updates.
The Node Service, delivering the Updated Data runs on Port 4949 per default. To add some level of security, you normal add a IP to a whitelist, that is allowed to query the Nodes Data.

You can use normal telnet for accessing the Nodes Data:

telnet localhost 4949
Trying ::1...
telnet: connect to address ::1: Connection refused
Trying 127.0.0.1...
Connected to localhost.
Escape character is '^]'.
# munin node at amun

Every Node delivers Information about specific Services provided by Plugins. To get an overview about the configured plugins you do a:

# munin node at amun
list
df df_inode fusion_mem fusion_pcpu fusion_pmem if_en0 if_err_en0 load lpstat netstat ntp_offset processes users

A Plugin always provides a Configuration Output and a Data Output. By Default if you query a Plugin, you will always get the Data Output:

# munin node at amun
df
_dev_disk1s2.value 34
_dev_disk0s1.value 48
_dev_disk3s2.value 62
_dev_disk2s1.value 6
_dev_disk2s2.value 32

To trigger the Config Output you need to add a config to your command:

# munin node at amun
df config
graph_title Filesystem usage (in %)
graph_args --upper-limit 100 -l 0
graph_vlabel %
graph_scale no
_dev_disk0s1.label /Volumes/Untitled
_dev_disk1s2.label /
_dev_disk2s1.label /Volumes/System-reserviert
_dev_disk2s2.label /Volumes/Windows 7
_dev_disk3s2.label /Volumes/Data

You can also use the tool munin-run for doing a basic test (it will be installed when installing your munin-node Binary)

 munin-run df
_dev_disk1s2.value 34
_dev_disk0s1.value 48
_dev_disk3s2.value 62
_dev_disk2s1.value 6
_dev_disk2s2.value 32
munin-run df config
graph_title Filesystem usage (in %)
graph_args --upper-limit 100 -l 0
graph_vlabel %
graph_scale no
_dev_disk0s1.label /Volumes/Untitled
_dev_disk1s2.label /
_dev_disk2s1.label /Volumes/System-reserviert
_dev_disk2s2.label /Volumes/Windows 7
_dev_disk3s2.label /Volumes/Data

Summary

So a Plugin needs to provide an Output both modes:

  • Configuration Output when run with the config argument
  • The (normal) Data Output when called withouth additional arguments

Plugins are Shell Scripts that can be written in every Programming language that is supported by the Nodes Shell (e.g. Bash, Perl, Python, etc.)

Since it is one of the easier Plugins we will have a look at the Plugin, monitoring the VPN Connections at our Mac OS Server in the next Post.

Managing Mac OS Software with Munki and Subversion

Flattr this!

At the Lisa ’13, some folks from Google did a talk how they managing all their Desktop (and Server?) Macs at Google. Besides obvious things (like using Puppet), they mentioned another Tool, Munki, for rolling out Software and Software Updates to different Clients. Since i am using several Mac Machines (Laptop, Workstation and some VMs) that used to have a quite similar Software Stack, i decided to give Munki a try. Instead of using a dedicated Webserver, i decided to go with a Subversion Repository, for having User Authentication and Versioning at the Backend.

Munki uses some concepts for organising its stuff:

  • catalogs: these are basically the Listings of Applications. Each Catalog contains some Applications to be installed.
  • manifests: these are configurations for the specific client setups – e.g. Java-Dev. You can combine several Manifest Files while including one in another. You can also define mandatory and optional Packages here.
  • pkgs: here are the basic DMG/PGK Packages stored. All Filenames are unique so you can have several Versions of one Program in one Repository.
  • pkgsinfo: Here the Basic Application Info is stored. You can have Dependencies between Packages, as well as Requirements for installing Packages.

There is an excellent Starting Guide here and a description for a Demo-Setup, how to setup a basic Munki Installation. So i won’t repeat it here.

pkgs and pkgsinfo can be strcutured into sub-folders.
My actuals setup looks like this:

> tree -L 2
.
├── catalogs
│   ├── all
│   └── testing
├── manifests
│   ├── developer_munki_client
│   └── test_munki_client
├── pkgs
│   ├── dev
│   ├── media
│   ├── utils
│   └── work
└── pkgsinfo
    ├── dev
    ├── media
    ├── utils
    └── work

So you basically configure your munki-client towards

bash-3.2$ /usr/local/munki/munkiimport --configure
Path to munki repo (example: /Users/philipp/munki  
Repo fileshare URL (example:  afp://munki.example.com/repo): https://example.com/svn/munki
pkginfo extension (Example: .plist): 
pkginfo editor (examples: /usr/bin/vi or TextMate.app): TextMate.app 
Default catalog to use (example: testing): testing

After that you can use munkiimport ##path-to-dmg## for importing Applications to Munki. After you did the final Import, you can use a Tool like MunkiAdmin to configure your Client-Setup and Application Dependencies.

The next step is to commit your changes to a Repository (that is reachable under https://example.com/svn/munki). You need to update every change to the Munki Repository to keep all Clients actual. The last Step is to implement the HTTP Basic Auth Access to the Subversion Repository. There is a good Description for that as well. You need to update your /Library/Preferences/ManagedInstalls.plist Files – that should actually be moved to /private/var/root/Library/Preferences/ManagedInstalls.plist, since it now contains some User Credentials. To add this Credentials you should use this Command, where You need to have username:password as a Base64 encoded String.

defaults write /Library/Preferences/ManagedInstalls AdditionalHttpHeaders -array "Authorization: Basic V...Q="

Building Native MacOS Apps with Java

Flattr this!

Some Time ago, Java and MacOS were friends. You could just open XCode choose “Java Application” and start coding your app. But since the last version of Xcode 3 and finally with the release of Xcode 4 all the nice Cocoa/Java Bindings were gone. The normal way of Apple to cleanup their System and make space for the support of new Features.

But sometimes you have this great Java Library. Or you just want to create a nice UI for your CLI Java App, and the common SWING UI won’t work and other UI Libraries like macwidgets just lack support for a decent UI Designer and will just add some more graphics to your plain Java UI.

There is a solution for that kind of Problem. It is called rococoa and offers Java a native Binding to your Cocoa Libs. There is also one famous Application that uses this Library and doing very well: Cyberduck.
This App also managed to get into the _AppStore_ by Bundling its own JDK to the App Bundle. You can see the source of Cyberduck here.

So What is an App Bundle?

An App Bundle is basically just a folder with an .app in its nahe. It contains some common Folders:

– a Content Folder with
-> a plist File
-> a Resources Folder

App Bundle Structure


There is an old Project called JarBundler to create MacOS App Bundles from your Java Project.
But for this example we are using the maven plugin “osxappbundle-maven-plugin”, for creating the App Bundle and a DMG File for Installation. We also adding the necessary Files for ROCOCOA.

The first Step is to create the necessary NIB File for our Application. In Xcode 3 you could just create a basic NIB with Interface Builder and then add the Outlets and Actions to the NSObject Class (that is the default First Responder). In Xcode 4+ you need to create a dummy controller Class first. Then you can add your Outlets to this class and the the first Responder to this Class.

XCode 4+ NIB and Dummy Class


You can now create your ViewController Class in Java:

  
// we re-using some of the work done by the cyberduck developer.
import ch.cyberduck.ui.cocoa.application.NSTextField;
import ch.cyberduck.ui.cocoa.application.NSWindow;
import ch.cyberduck.ui.cocoa.foundation.NSBundle;
import ch.cyberduck.ui.cocoa.foundation.NSObject;

import org.rococoa.ID;
import org.rococoa.Rococoa;

public class WindowController {

    public WindowController() {
        String bundleName = "HelloWorld";
        // Load the NIB file and pass it our Rococoa proxy as the file owner.
        if (!NSBundle.loadNibNamed(bundleName, this.id())) {
            System.err.println("Couldn't load " + bundleName + ".nib");
            return;
        }
    }
    // Injected outlet from NIB
    private NSWindow mainWindow;

    private NSTextField textField;

    // Called when loading NIB using NSBundle. NIB has a mainWindow outlet defined.
    public void setMainWindow(NSWindow mainWindow) {
        System.out.println("Outlet set to: " + mainWindow.title());
    }

    // bind the Outlet to the Class Attribute.
    public void setTextField(NSTextField textField){
        this.textField = textField;
    }

    // NSButton in NIB has an action to the file owner named buttonClicked:
    public void buttonClicked(ID sender) {
        textField.setStringValue("Hello World from: " + sender);
    }

    /**
     * You need to keep a reference to the returned value for as long as it is
     * active. When it is GCd, it will release the Objective-C proxy.
     */
    private NSObject proxy;
    private ID id;

    public NSObject proxy() {
        return this.proxy(NSObject.class);
    }

    public NSObject proxy(Class type) {
        if (null == proxy) {
            proxy = Rococoa.proxy(this, type);
        }
        return proxy;
    }

    // Getter for ID for Rococoa Binding
    public org.rococoa.ID id() {
        return this.id(NSObject.class);
    }

    // Setter for ID for Rococoa Binding
    public org.rococoa.ID id(Class type) {
        if (null == id) {
            id = this.proxy(type).id();
        }
        return id;
    }
}

Your main methode is very simple. It just calls the ViewController and creates the AutoreleasePool for your App:

import ch.cyberduck.ui.cocoa.application.NSApplication;
import ch.cyberduck.ui.cocoa.foundation.NSAutoreleasePool;

/**
 * Hello world!
 *
 */
public class App {
    public static void main(String[] args) {
        final NSAutoreleasePool pool = NSAutoreleasePool.push();
        try {
            // This method also makes a connection to the window server and completes other initialization.
            // Your program should invoke this method as one of the first statements in main();
            // The NSApplication class sets up autorelease pools (instances of the NSAutoreleasePool class)
            // during initialization and inside the event loop—specifically, within its initialization
            // (or sharedApplication) and run methods.
            final NSApplication app = NSApplication.sharedApplication();
            WindowController w = new WindowController();
            // Starts the main event loop. The loop continues until a stop: or terminate: message is
            // received. Upon each iteration through the loop, the next available event
            // from the window server is stored and then dispatched by sending it to NSApp using sendEvent:.
            // The global application object uses autorelease pools in its run method.
            app.run();
        } finally {
            pool.drain();
        }
    }
}

I am using an updated version of this example from the rococoa Project Page.

Finally you have to put all the things together; Compiling your Java Files, adding your native Libs, Creating your App-Bundle and your DMG.
I updated the Plugin to be able to add non Java Dependencies to Your App Bundle (like dylibs and NIB Files). You can find the updated version here. I am currently working on creating patch files for upstreaming my changes to the codehaus project.

The important Call of the Maven-Plugins reads like this:

<?xml version="1.0" encoding="UTF-8" standalone="yes"?>
<project xmlns="http://maven.apache.org/POM/4.0.0" xmlns:xsi="http://www.w3.org/2001/XMLSchema-instance" xsi:schemaLocation="http://maven.apache.org/POM/4.0.0 http://maven.apache.org/maven-v4_0_0.xsd">
    <modelVersion>4.0.0</modelVersion>
    <groupId>de.javastream.rococoa</groupId>
    <artifactId>helloworld</artifactId>
    <packaging>jar</packaging>
    <version>1.0-SNAPSHOT</version>
    <name>Hello World</name>
    <url>https://github.com/phaus/rococoa-tests/helloworld</url>
    <build>
        <plugins>
...
 <plugin>
                <groupId>org.codehaus.mojo</groupId>
                <artifactId>osxappbundle-maven-plugin</artifactId>
                <version>1.0-SNAPSHOT</version>
                <configuration>
                    <!-- PLIST Settings -->
                    <workingDirectory>$APP_PACKAGE/Contents/Resources/Java</workingDirectory>
                    <vmOptions>-Xmx512m -Djava.library.path=$APP_PACKAGE/Contents/Resources/Java/lib -Djna.boot.library.path=$APP_PACKAGE/Contents/Resources/Java/lib -Djna.library.path=$APP_PACKAGE/Contents/Resources/Java/lib -Djna.nounpack=true -Djava.awt.headless=true -Dsun.jnu.encoding=utf-8 -Dfile.encoding=utf-8 -XX:-UsePerfData -XX:+ReduceSignalUsage -Xincgc -XX:-UseLoopPredicate -XX:-OptimizeStringConcat</vmOptions>
                    <mainClass>de.javastream.rococoa.apptest.App</mainClass>
                    <dictionaryFile>${basedir}/src/main/resources/Info.plist</dictionaryFile>
                    <iconFile>${basedir}/src/main/resources/helloworld.icns</iconFile>
                    <!-- adding additional files to the DMG -->
                    <additionalArchiveFiles>
                        <fileSet>
                            <directory>${basedir}/src/main/doc</directory>
                            <includes>
                                <include>COPYING</include>
                                <include>COPYING.LESSER</include>
                                <include>release-notes.txt</include>
                            </includes>
                        </fileSet>
                    </additionalArchiveFiles>
                    <!-- Adding additional Resources (like NIBs) -->
                    <additionalResources>
                        <fileSet>
                            <directory>${basedir}/xcode</directory>
                            <includes>
                                <include>*.lproj/**</include>
                            </includes>
                        </fileSet>
                    </additionalResources>
                    <!-- Adding Native Java Libs -->
                    <additionalBundledClasspathResources>
                        <fileSet>
                            <directory>${basedir}/src/main/lib</directory>
                            <includes>
                                <include>libjnidispatch.dylib</include>
                            </includes>
                        </fileSet>
                        <fileSet>
                            <directory>${basedir}/target</directory>
                            <includes>
                                <include>librococoa.dylib</include>
                            </includes>
                        </fileSet>
                    </additionalBundledClasspathResources>
                </configuration>
                <executions>
                    <execution>
                        <phase>package</phase>
                        <goals>
                            <goal>bundle</goal>
                        </goals>
                    </execution>
                </executions>
            </plugin>
            
            ...
        </plugins>
    </build>
    <dependencies>
        <dependency>
            <groupId>org.rococoa</groupId>
            <artifactId>rococoa-core</artifactId>
            <version>0.5</version>
        </dependency>
        <dependency>
            <groupId>junit</groupId>
            <artifactId>junit</artifactId>
            <version>3.8.1</version>
            <scope>test</scope>
        </dependency>
        <dependency>
            <groupId>org.slf4j</groupId>
            <artifactId>slf4j-api</artifactId>
            <version>1.6.4</version>
        </dependency>
        <dependency>
            <groupId>net.java.dev.jna</groupId>
            <artifactId>jna</artifactId>
            <version>3.3.0</version>
        </dependency>
        <dependency>
            <groupId>cglib</groupId>
            <artifactId>cglib</artifactId>
            <version>2.2.2</version>
        </dependency>
    </dependencies>
    
    ...
   <repositories>
        <repository>
            <id>maven.javastream.de</id>
            <name>javastream Repository</name>
            <url>http://maven.javastream.de</url>
            <snapshots>
                <enabled>true</enabled>
            </snapshots>
        </repository>
    </repositories>
    <pluginRepositories>
        <pluginRepository>
            <id>maven.javastream.de</id>
            <url>http://maven.javastream.de</url>
        </pluginRepository>
    </pluginRepositories>
    
...
</project>


You can find the whole project on Github. It is a very simple Hello World Programm. As soon as you click the Button the Labels text changes to “Hello World from: #CALLER-ID”.

App Window


The next step is to do further updates to the Plugin, for Bundling a JDK to your App Bundle for creating a real Standalone Application.

MacOS update 10.6.4 and GPGMail

Flattr this!

So the latest MacOS Update broke the gpg-mail Plugin again. But it seems that the old UUID Trick saves the show.
First close Mail.app.
Then you need to find out the new PluginCompatibilityUUIDs from Mail.app and the Message Framework.

cat /System/Library/Frameworks/Message.framework/Resources/Info.plist | grep UUID -A 1
cat /Applications/Mail.app/Contents/Info.plist |grep UUID -A 1 | grep UUID -A 1

Then you need to open the gpg-mail Bundle.
Look into /Users/[username]/Library/Mail/Bundles
You can open GPGMail.mailbundle via the Context Menu. You need to add the two new UUIDs to the Node SupportedPluginCompatibilityUUIDs in the Info.plist file.

Save and then restart Mail.app.

via gpgmail-users@lists.sourceforge.net and @morrow

system update :-/

Flattr this!

Wer meine vergangenen Kurzbeiträge verfolgt hat, hat mitbekommen, dass ich mein System auf MacOS 10.6 aktualisiert habe.
Neben vielen Dingen die erstaunlich problemlos liefen, gibt es leider auch einige Probleme.
Manche davon ließen sich sehr einfach lösen:

  • Die fehlenden Java Versionen 1.4 bis 1.5 lassen sich einfach durch das manuelle Kopieren aus einem Backup wieder herstellen
  • Weiterhin gibt es einige Programme, die fehlerhaft, oder gar nicht liefen:
    • Cyberduck lief gar nicht – da gibt es mittlerweile eine lauffähige, neue Version auf der Homepage
    • BetterZip lief zwar, konnte aber keine tar.gz Files mehr lesen. Auch hier gibt es eine neue Version, siehe eine der letzten Posts
  • Was für mich viel störender ist, ist das Nicht-Funktionieren des gpgMails Plugins von Stéphane Corthésy, da ich hin und wieder doch gerne verschlüsselte Emails verschicke. Das das Plugin von der aktuellen Version von Mail.app deaktiviert wird, hat wohl 2 Gründe:
    1. Wird das aktuelle Mail.app standardmäßig als 64bit-Anwendung ausgeführt. Das gpgMail Plugin ist allerdings nur als 32bit Version kompiliert.
    2. Hat sich mit der neuen Version wohl auch die (undokemntierte) API von Mail.app geändert.

Jeder der einmal versucht hat, eine API anhand von Message Calls und vorhandenen Headern zu reverse-engeneeren kann wohl nachvollziehen, wieso Stéphane für eine weitere Runde dieser Arbeit keine Zeit hat. Aber da das Plugin als Source vorliegt, liegt es ja nahe, sich der Sache selbst anzunehmen. Zwar sind meine Objective-C Kenntnisse bei weitem noch nicht so gut, wie ich es gerne hätte, allerdings ist das Plugin zwar sehr gut in Mail.app eingefügt, allerdings dient es ja nur als Client für libgpg. Zudem sind die Sourcen wirklich gut kommentiert worden, sodass die Stellen, an denen man Snow-Leopard spezifischen Code einfügen müsste, sehr schnell deutlich werden :-).

Stéphane hat hierzu in dem Projektforum von sourceforge ein paar Hinweise gegeben. So werden für eine erfolgreiche Kompilierung von gpgMail zuerst einmal universal-binary(UB) (oder nur 64bit) Versionen von gpg, libgpg-error, libgpgme und dem MacGPGME framework benötigt.

Mein erster Versuch mit gpg,libgpg und libgpg-error über macports zu Installieren und danach per hardlinks von /opt auf /usr zu linken, brachte mir zumindest eine kompilierte 64bit Version vom MacGPGME framework. Ein UB lässt sich nicht kompilieren, da ich scheinbar von den libs nur eine expliziete 64bit Version besitze (womöglich müsste ich die hardlinks auch im lib64 Verzeichnis erstellen).

Momentan bin ich dabei das MacGPGME framework in einer UB Version zu erstellen. Was mich ein wenig gewundert hat ist, dass gpgMail scheinbar Header Dateien verlangt, welche das MacGPGME framework gar nicht hergibt.

Es ist zumindest vermeldet worden, dass ein weiterer Entwickler sich der Sache angenommen hat, der zumindest mehr Ahnung zu haben scheint als ich :-). Vielleicht werde ich mich dann mal bei ihm melden, so ich denn nennenswerte Fortschritte erreichen kann. Ist zu hoffen, dass die API Änderungen von Mail.app nicht zu gravierend sind….