
Written by Philipp on 2015-09-29
Install CoreOS on Proxmox
Network . Tooling . Uncategorized . VirtualisierungSome words before we start… Hello Blog, it’s been a while. I still have to deliver the last part of the Munin Plugin Development Series (Part 1, 2, 3). Today I would like to write something about the Setup of a CoreOS Environment on Proxmox. Proxmox is a Debian based Distribution that bundles a Web
Written by Philipp on 2014-12-05
Writing Munin Plugins pt3: some Stats about VMWare Fusion
Bash . Graphics . Perl . VirtualisierungIn a project where we had the need for VMs being capable of doing CI for Java and also doing CI for iOS Application (using XCode Build Bots), we decided to go with a Mac OS Server as the Host Platform and using VMWare Fusion as the base Virtualisation System. We had several VMs there
Written by Philipp on 2014-08-18
Adding Background Image to SVG Circles
Graphics . Tooling . UIIf you want to create nifty Graphics and Animation in the web, you cannot avoid d3.js. D3.js uses SVG as the basic Displaying Technologie. And sometimes you know, why SVG had such a hard time persuading developers. It is a simple task:Creating a Circle with an image as a background. The everyday Web-Developer would just

Written by Philipp on 2014-08-03
Disable GitHub Image Cache for CI Build Badges
BuildSince some time, GitHub caches Images, that are linked in Wiki-Pages or Readme files. That’s not optimal, when you want to display current states (e.g. the Build Status of your CI Job). To disable the Caching for a specific Image, you need to configure a proper Caching Header. So before the Changes, you have: $
Written by Philipp on 2014-06-22
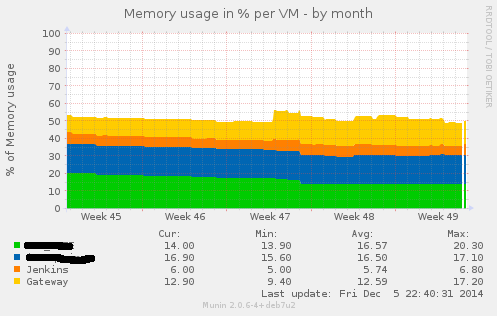
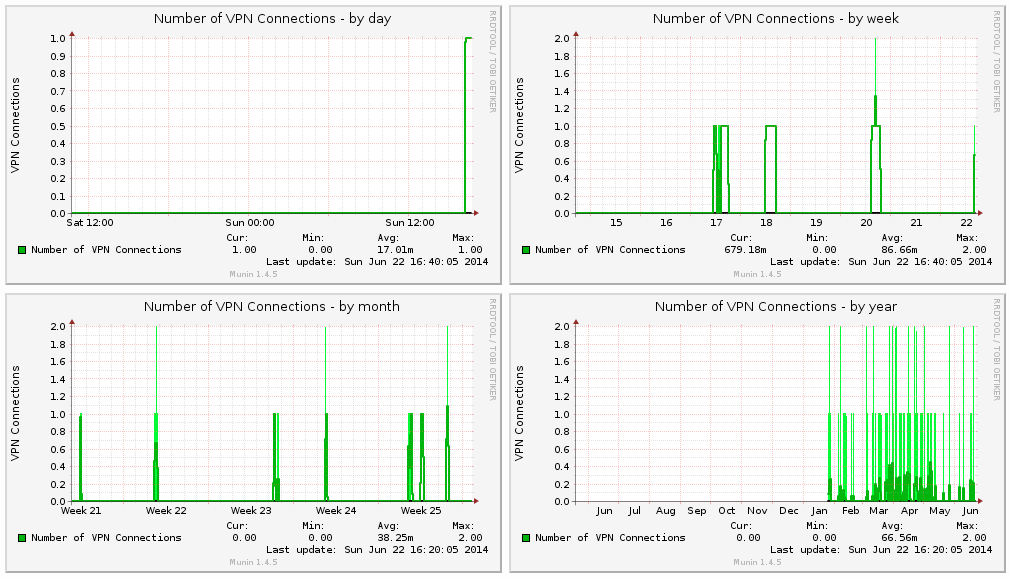
Writing Munin Plugins pt2: counting VPNd Connections
Mac . Network . Perl . ToolingPreamble Every Munin Plugin should have a preamble by default: #!/usr/bin/env perl # -*- perl -*- =head1 NAME dar_vpnd a Plugin for displaying VPN Stats for the Darwin (MacOS) vpnd Service. =head1 INTERPRETATION The Plugin displays the number of active VPN connections. =head1 CONFIGURATION No Configuration necessary! =head1 AUTHOR Philipp Haussleiter <philipp@haussleiter.de> (email) =head1 LICENSE

Written by Philipp on 2014-06-22
Writing Munin Plugins pt1: Overview
Bash . Mac . NetworkWriting your own Munin Plugins Around February this year, we at innoQ had the need for setting up a Mac OS based CI for a Project. Besides building of integrating some standard Java Software, we also had to setup an Test Environment with Solaris/Weblogic, Mac OS for doing a CI for an iOS Application and
Written by Philipp on 2014-02-09
Managing Mac OS Software with Munki and Subversion
Mac . TechAt the Lisa ’13, some folks from Google did a talk how they managing all their Desktop (and Server?) Macs at Google. Besides obvious things (like using Puppet), they mentioned another Tool, Munki, for rolling out Software and Software Updates to different Clients. Since i am using several Mac Machines (Laptop, Workstation and some VMs)
Written by Philipp on 2013-09-09
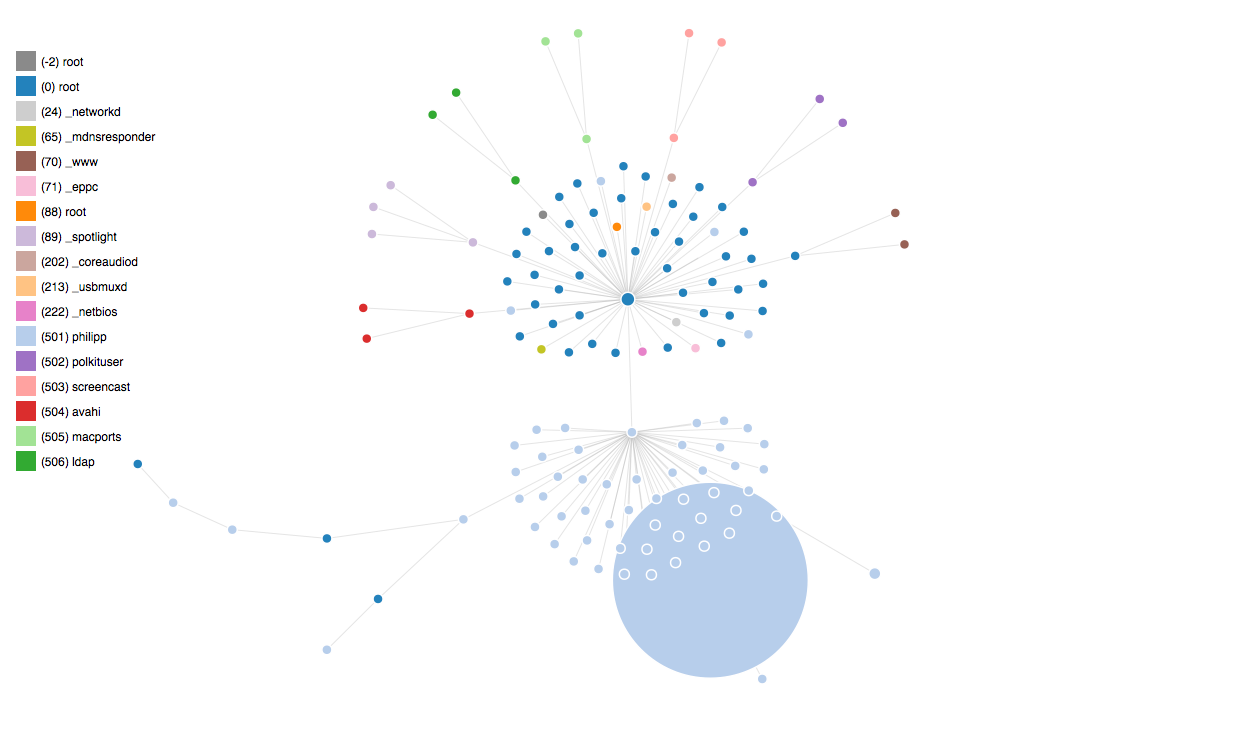
Plotting UNIX Processes with D3
Graphics . JavascriptI created another Plot, using D3js: You can find all Scripts here. I am still have to figure out how to do graph updates and add label to the nodes.
Written by Philipp on 2013-09-03
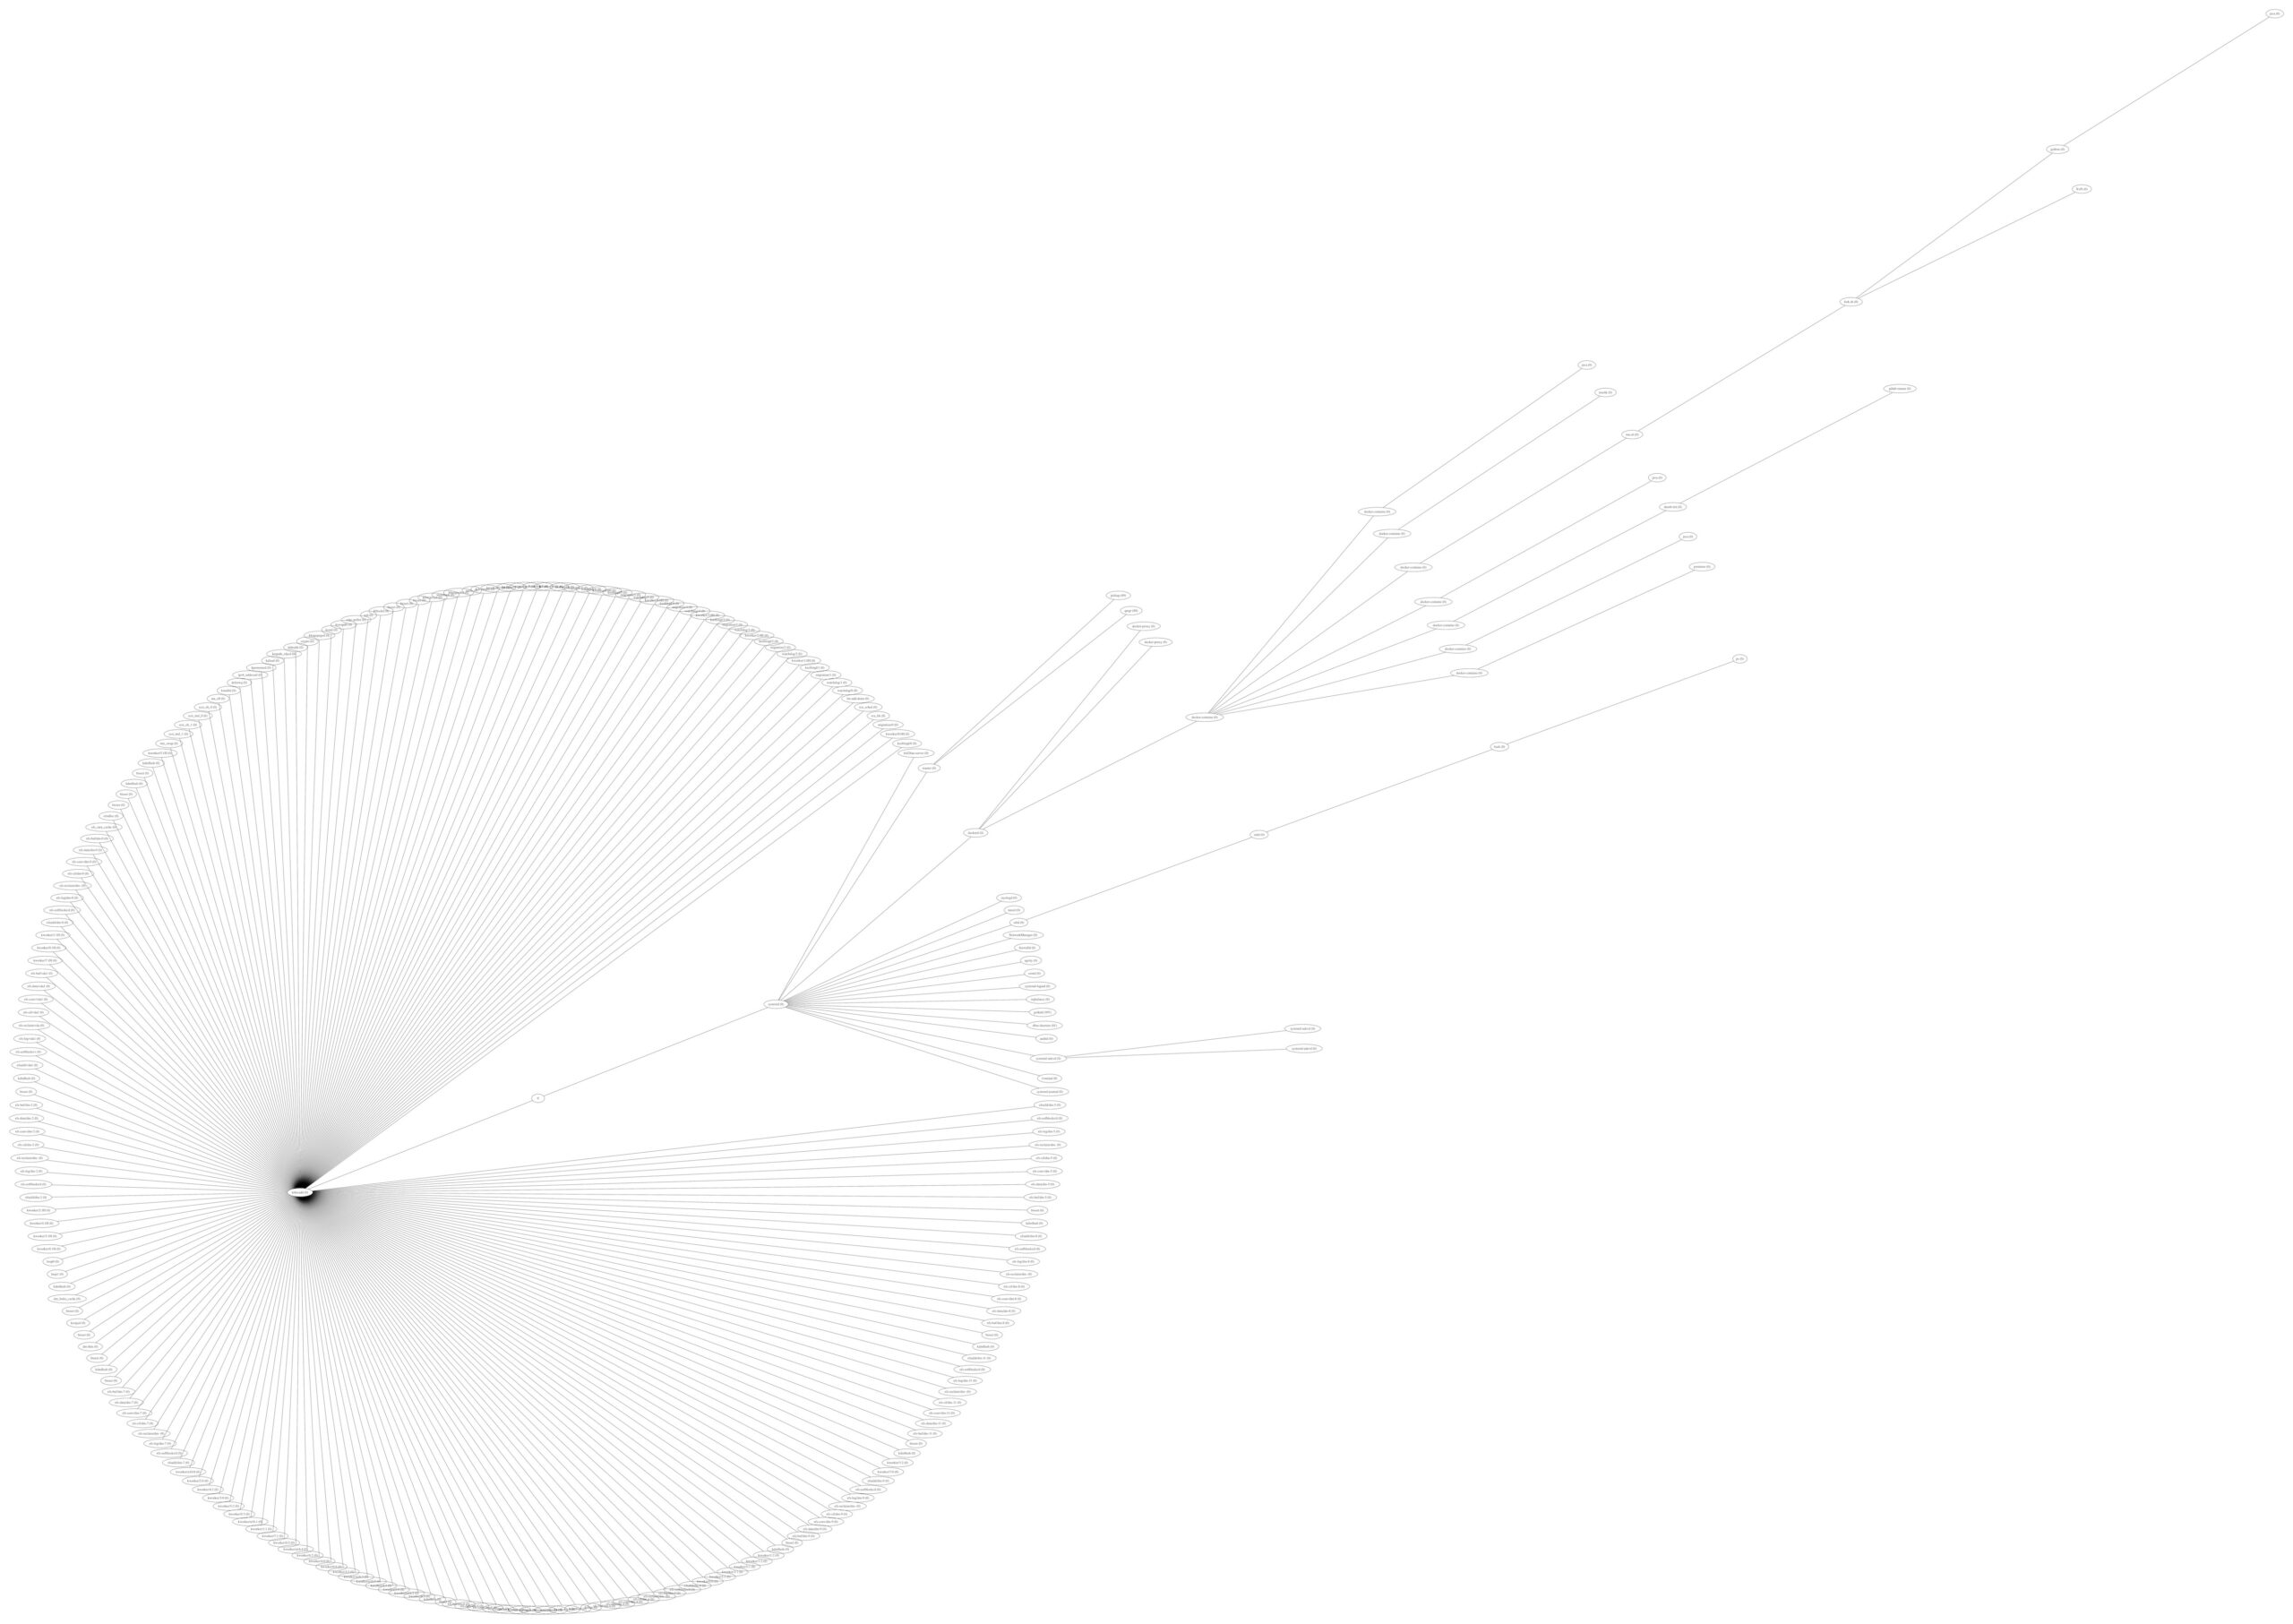
Plotting UNIX Processes with DOT
Graphics . Javascript . ToolingInspired by this Post this post, I started playing around with ps, nodejs and GraphViz. After reading some ps man Pages, i found the necessary ps parameters. For MacOS i used ps -A -c -o pid,ppid,pcpu,comm,uid -r For Linux i used ps -A -o pid,ppid,pcpu,comm,uid You then get some Output like: PID PPID %CPU COMMAND

Written by Philipp on 2013-08-04
Build and Test Project TOX under MacOS
Build . Hacking . Network . ToolingSome Steps to do You need to have XCode with installed CLI Tools (see here) If you are using MacPorts (you really should), you need to install all necessary Dependencies: port install libtool automake autoconf libconfig-hr libsodium cmake Checkout the Project TOX Core Repository: git clone –recursive https://github.com/irungentoo/ProjectTox-Core.git cd ProjectTox-Core cmake . make all You